What is a screen recorder?
The function of a screen recorder also referred to as screen capture software, is to record and capture every action taking place on your screen. Screen recording has become a crucial tool for a variety of tasks, including producing tutorials, demonstrating software, or capturing webinars due to the growth of digital content creation and remote work.
The popularity of online screen recorder programs has grown as a result of their usability and availability. We are aware that using videos is the best way to make sure your message stays in people’s minds. As stated by Forbes, “Viewers retain 95% of a message when they watch it on video, compared to 10% when reading it in a text”.
In this thorough instruction, we’ll show you easy step-by-step instructions on how to use an online screen recorder tool application to capture your computer screen easily and create recordings of the highest quality.
Step 1: Choose a Reliable Online Screen Recorder Tool
Choosing the best online screen recorder tool for your needs is the first step in utilizing one. Find a reliable screen recorder tool that is simple to use and includes a variety of functions, such as several video format choices, audio recording capabilities, and editing facilities. Making sure the programs is compatible with your operating system and browser is also essential.
Step 2: Access the Online Screen Recorder Tool
Once you’ve chosen the appropriate screen recorder tool, access its website through your preferred browser. The majority of online screen recorder programs are web-based, so your computer does not need to be installed with any additional software. Access the tool’s website and begin using it right away.
Step 3: Adjust Recording Settings
It’s essential to set up the recording settings in accordance with your needs before you begin recording. Online screen recorder applications typically let you change options like video quality, frame rate, audio source, and the region of the screen that will be recorded. For instance, choose “Full Screen” if you wish to capture the full screen. If you only need to capture a specific application or browser tab, choose the relevant option accordingly.
Step 4: Select Audio Input
If your recording includes audio, make sure to select the appropriate audio input source. You can choose to record system audio (computer sound) or microphone audio (your voice or external audio). Many online screen recorder tools also provide the option to record both system audio and microphone audio simultaneously.
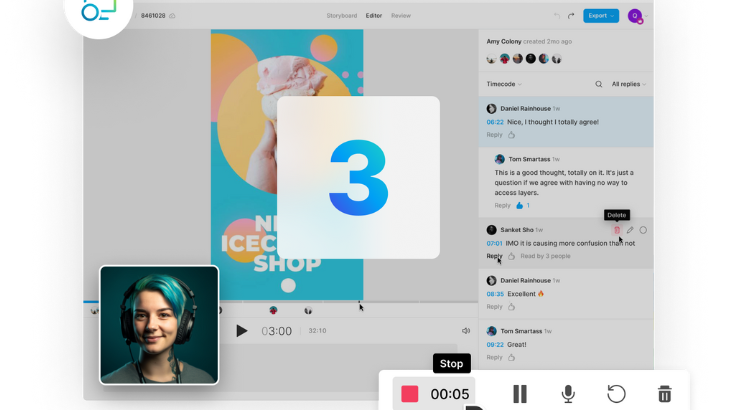
Step 5: Start Recording
Click “Record” or “Start” to start the screen recording after establishing the preferences and choosing the audio input. Before recording begins, certain tools can ask you to confirm your settings. A countdown may show when you press the record button to allow you a short period of time to get ready.
Step 6: Perform the Screen Recording
During the recording process, perform the actions you want to capture on your screen. Whether you’re demonstrating a software tutorial, presenting a PowerPoint presentation, or showcasing a product, ensure that your movements are clear and steady. Speak audibly and clearly if you are recording with audio commentary.
Step 7: Pause or Stop Recording
Most online screen recorder tools offer the option to pause and resume recording, allowing you to segment your recording and eliminate unwanted footage. Click the corresponding button on the recording interface to pause the recording. Tap the “Stop” button to end the recording.
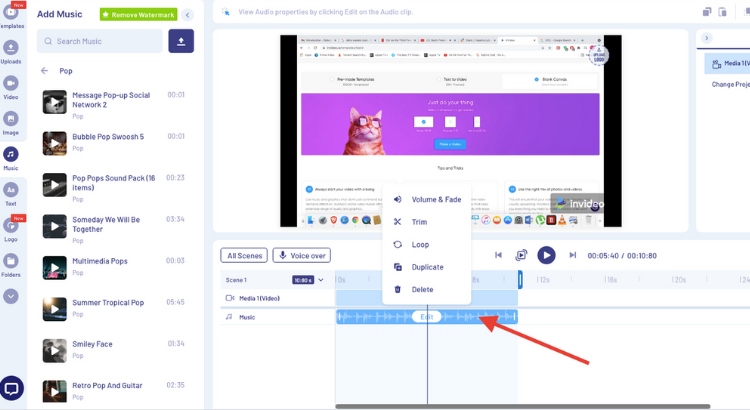
Step 8: Preview and Edit the Recording
After you’ve stopped the recording, the online screen recorder tool usually offers a preview of your captured footage. Here, you can review the recording for any errors or sections that may need editing. Some tools might provide basic editing features, such as trimming, cutting, or adding annotations.
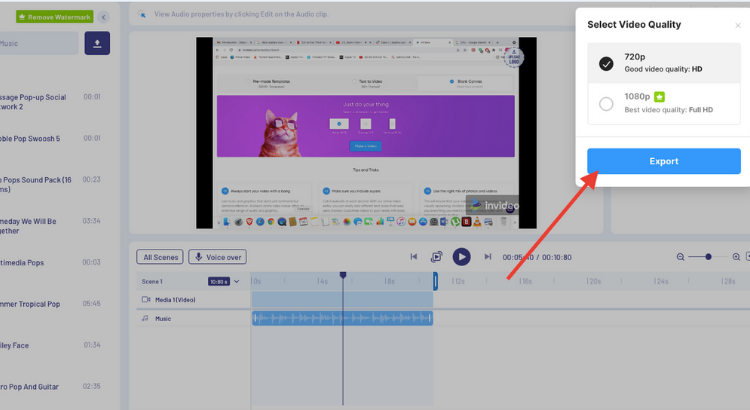
Step 9: Save or Export the Recording
Once you’re satisfied with your recording and any necessary edits, save or export the video file.
Typical export options for online screen recorder software include MP4, AVI, and GIF. Select the format that best meets your requirements, then save the file to the location you prefer on your computer.
Step 10: Share and Distribute Your Recording
After saving or exporting your recording, it’s time to share your content with your audience.
It is straightforward to share your recordings instantly on other platforms due to the built-in sharing features that are frequently provided by online screen recorder programs.
Your screen recording is simple to upload to video-sharing services like YouTube or Vimeo, embed in a blog post or website, or distributed via social media. You may successfully communicate with your audience and reach a larger one by sharing your screen recording.
Conclusion
The process of recording your screen for a variety of uses can be made substantially simpler by using an online screen recorder application. By following this step-by-step approach, you can make the most of these tools to quickly share knowledge, have remote meetings, and create engaging and informative content.
Whether you’re an expert, instructor, or content creator, learning the skill of online screen recording can boost your productivity and communication in the digital age. Given the range of tools available, finding the right online screen recorder tool and using it effectively could be a game-changer in your digital journey.